We meet on your lot
The design process starts on site — walking the property, looking at view lines, slope, sun and access, and talking about the challenges if there are any. Most clients arrive with a preliminary sketch or a plan printed off the internet. Everyone has their own ideas for a layout, and that's exactly where we start.
From there I take your ideas, needs and wants, and the design process begins. Through email and phone conversations we work together until it's your dream home on paper.
The floor plan takes shape
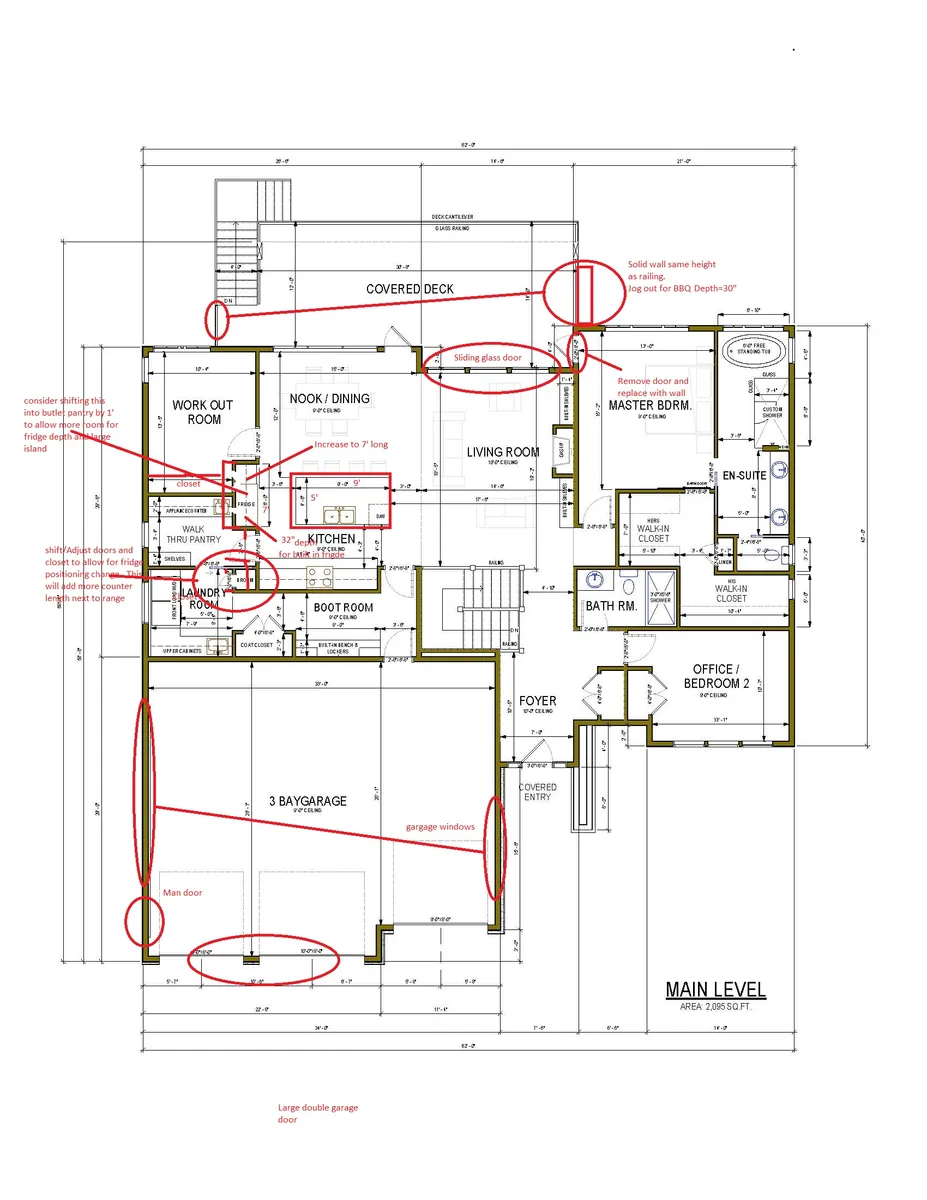
The floor plan is where your life gets drawn: how you cook, where the morning light lands, where the kids drop their boots. We iterate together — I draw, you react, I redraw. Changes are part of the process, not a problem.
Markups, revisions, repeat
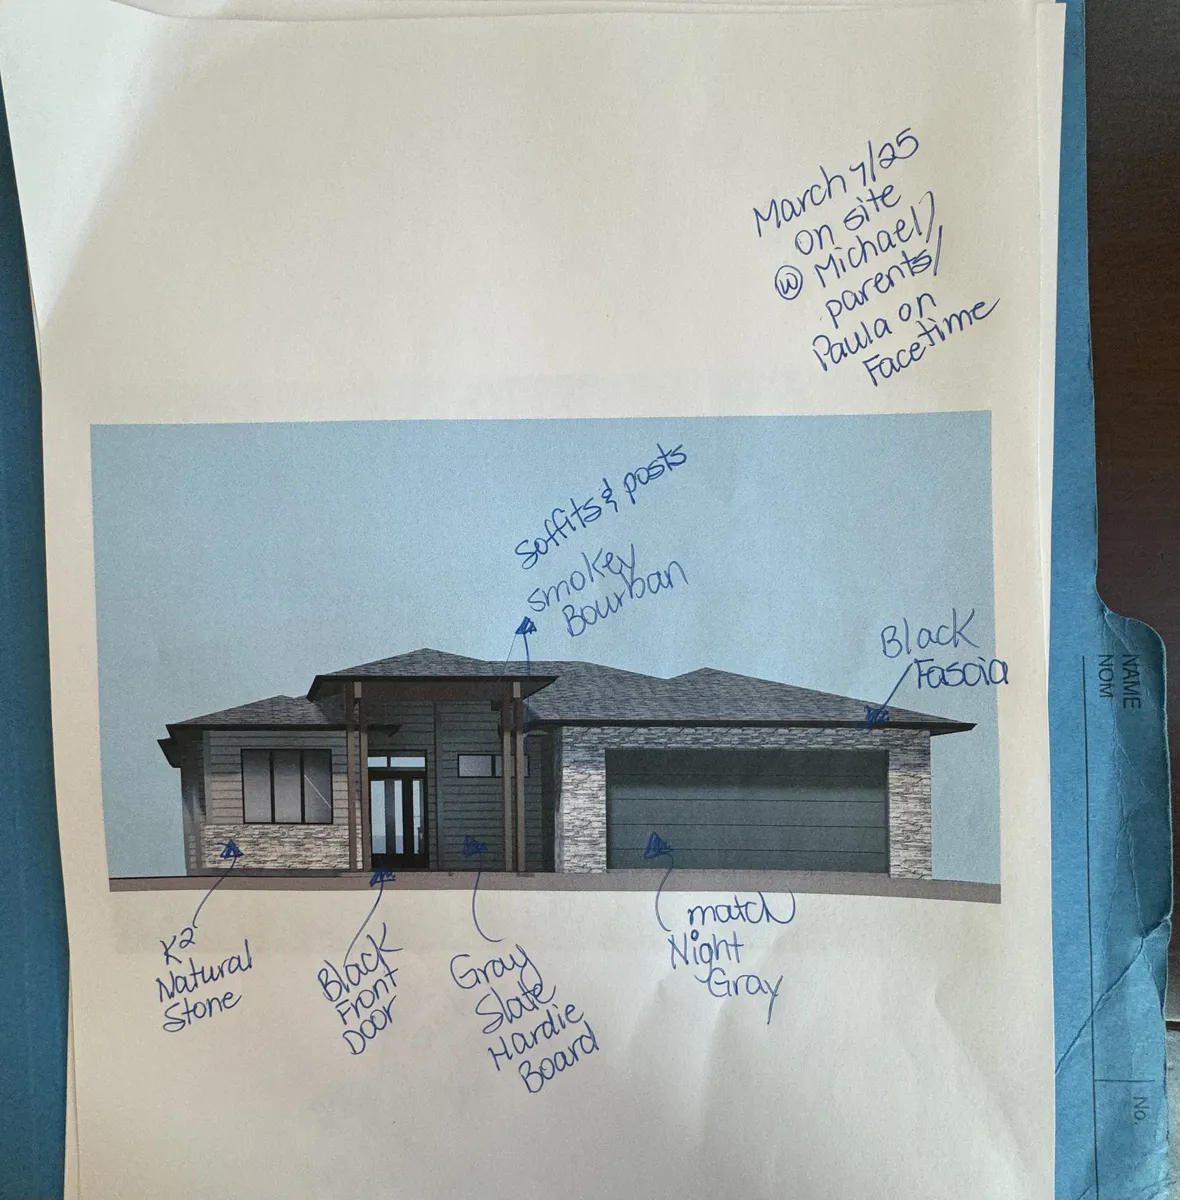
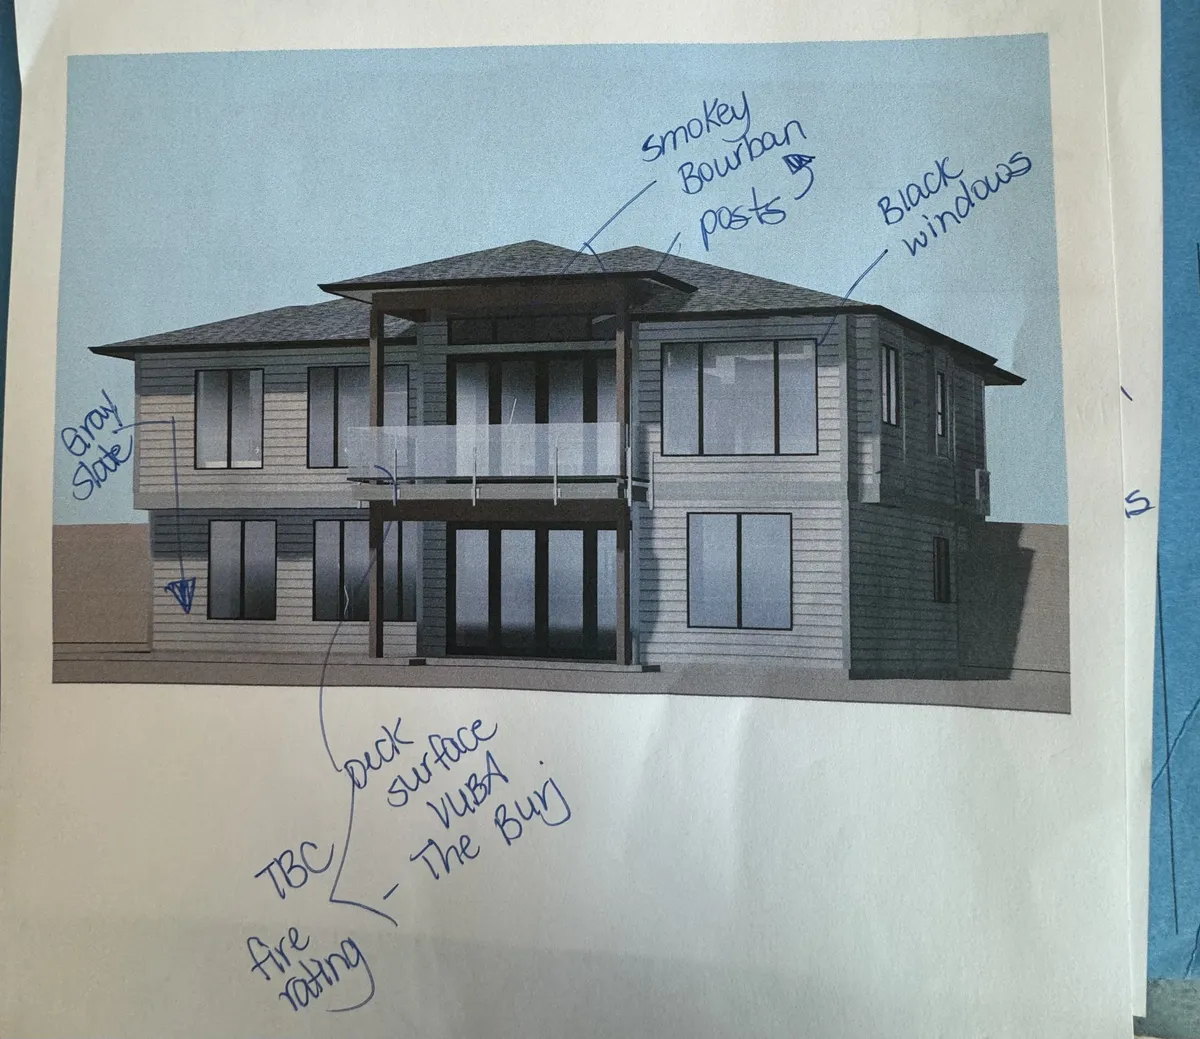
Every elevation goes back and forth with notes in the margins — window sizes, rooflines, materials, heights. This is the part most designers hide. I think it's the most important part: it's proof the design is being tested against what you actually want.
Making it stand up
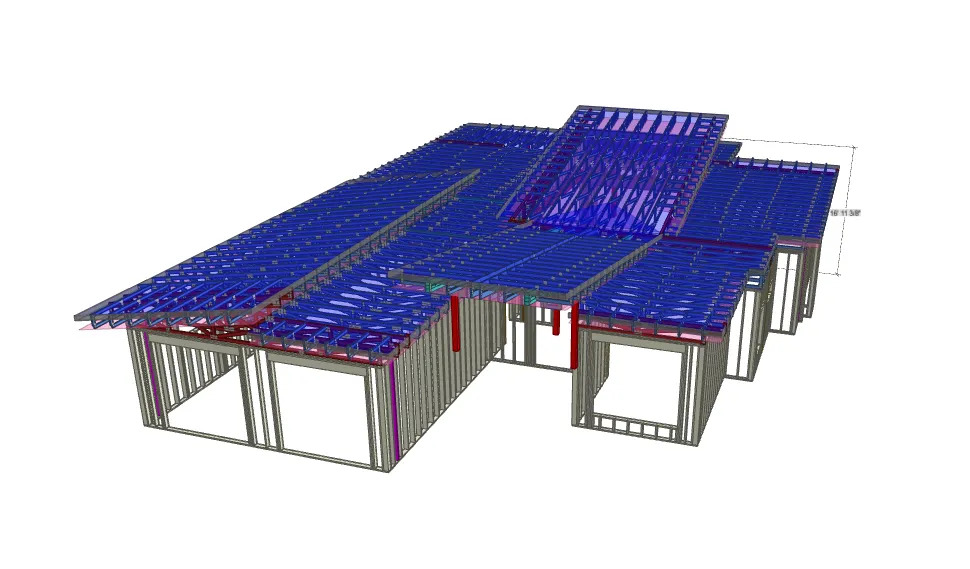
Behind the finished look is the skeleton: roof truss layouts, beam placement, floor joist plans. I model the structure in 3D so conflicts get solved on screen — not discovered by your framer on site. That saves real time and real money during construction.
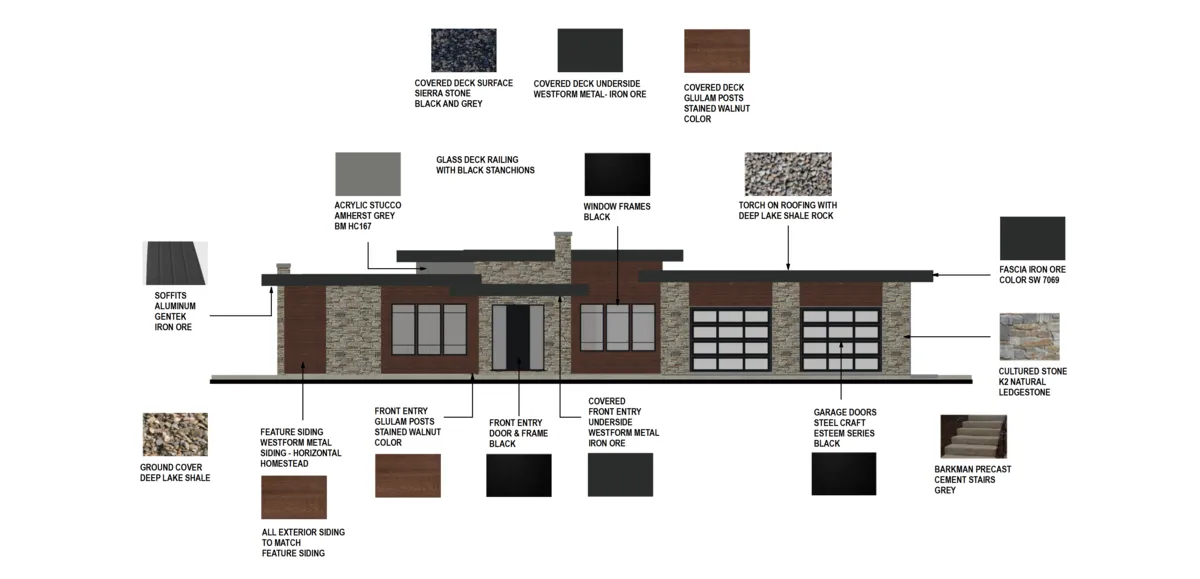
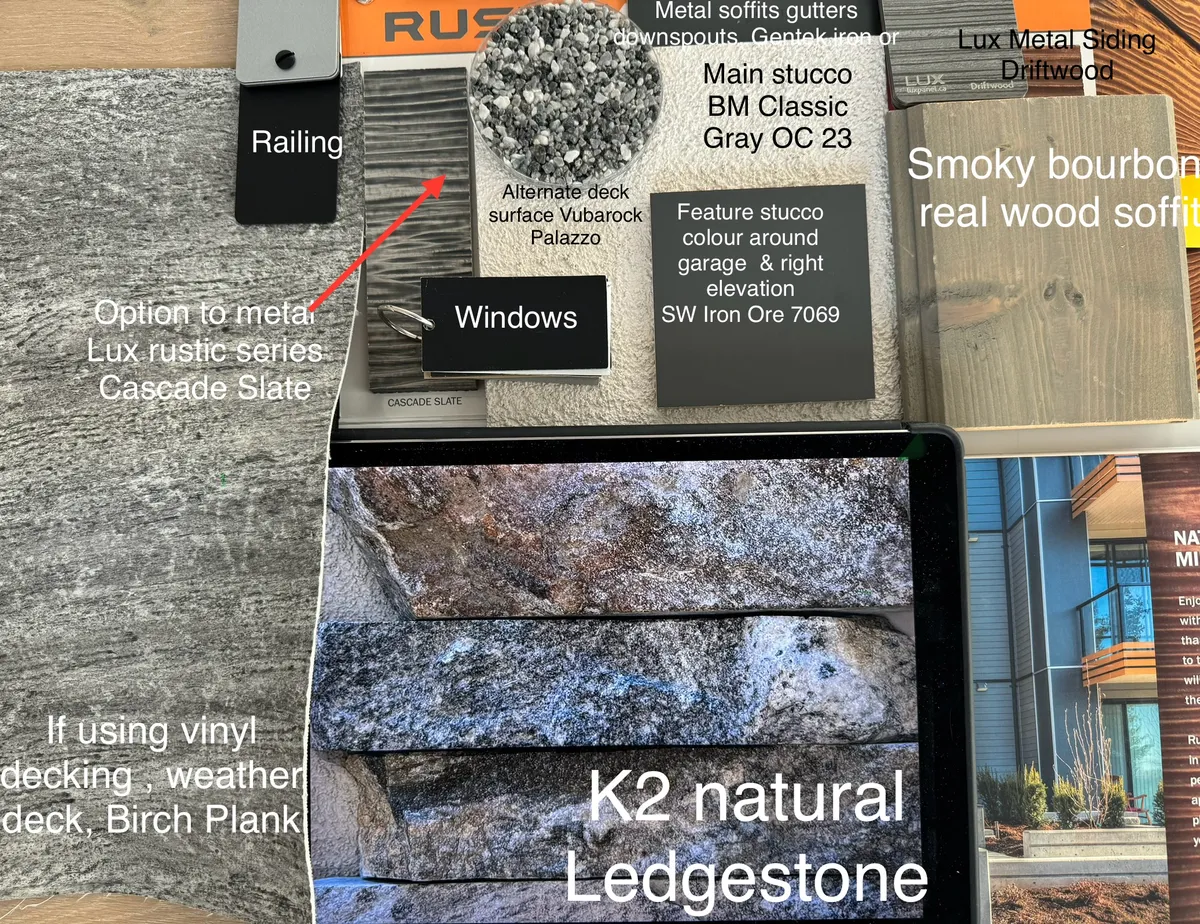
Colours and textures, chosen early
Stone, siding, soffit, windows, trim — pinned down on colour and texture boards while the design is still on paper. It keeps the exterior cohesive and gives your builder a clear target from day one.
From drawing to daylight
Finally, the design gets rendered photoreal — the same house, first as the working design model, then as it will look on your lot in the evening light. This is the moment clients say "that's it, that's our house."